
What do you do when digital asset prices stop trending and start moving sideways? Many investors feel stuck. A powerful method exists to capitalize on these periods. It involves identifying predictable channels where an asset’s value bounces between clear upper and lower boundaries.
This approach becomes especially useful during quieter market phases. When volatile surges and drops settle down, a horizontal pattern often forms. Recognizing this setup is the first step toward finding consistent opportunities.
It’s common to feel frustrated when major trends fade. Prices seem to stall, and direction is unclear. However, these conditions are not dead zones. They can be highly profitable for those who know how to navigate them.
This guide will show you how to thrive. You’ll learn to spot reliable zones where an asset oscillates. We’ll cover planning your entries and exits with precision. Implementing stop-losses to protect your capital is also crucial. The core idea is simple: aim to buy near the floor and sell near the ceiling.
Mastering this skill adds a valuable tool to your investor toolkit. It teaches you how to generate returns even when markets aren’t making headlines. You can build a repeatable, disciplined plan for these specific conditions.
Introduction to Crypto Range Trading
Periods of low volatility often create predictable patterns that savvy investors can exploit. When asset values move sideways instead of trending up or down, they form what’s known as a trading range.

This approach involves identifying a horizontal channel where an asset’s value bounces between two boundaries. The lower boundary is called support, while the upper boundary is resistance.
Think of it like a ping-pong ball bouncing between the floor and ceiling. The ball represents price movement within these established limits.
Successful practitioners aim to buy near support and sell near resistance. They profit from these repeated oscillations within the ranges in crypto trading.
It’s crucial to remember these boundaries work as zones, not exact numbers. No range lasts forever, as breaks eventually occur when momentum shifts.
The strategy relies on mean reversion—the idea that price tends to return toward the range’s middle. Experienced traders treat support and resistance as probabilities, not guarantees.
This time-tested method formalizes the classic “buy low, sell high” principle. It provides a structured framework for capitalizing on stable market conditions.
Understanding Support and Resistance Fundamentals
In markets lacking a clear trend, specific price levels emerge as battlegrounds between supply and demand. These are known as support and resistance. They form the essential boundaries of any sideways channel.
Think of them as zones, not thin lines on a chart. Price action respects these broad areas where buyer and seller interest concentrates.
Defining Support and Resistance Levels
The support zone is where buying pressure consistently halts further declines. It acts as a floor for asset values.
Conversely, resistance levels form where selling pressure repeatedly pushes prices down. This creates a ceiling.
A critical concept is role reversal. If support breaks decisively, it often flips to become new resistance. The same dynamic works in reverse.

Interpreting Price Zones in Sideways Markets
You draw these boundaries by connecting repeated swing highs and lows. Ignore random spikes and focus on levels with multiple touches.
Higher timeframe charts usually provide stronger, more reliable signals. The center of the channel acts as a balance point.
Most activity and opportunity happen near the edges. Successful execution depends on price reacting at these key levels again and again.
Crypto Range Trading Strategy Explained
When asset values oscillate within a defined corridor, a disciplined method can turn this stability into opportunity. This approach systematically exploits predictable highs and lows on a chart.
First, identify markets moving sideways where price action remains contained. Next, mark the boundaries that form the upper and lower limits of this channel.
Basic Principles of Buying Low and Selling High
The core mechanic is straightforward: purchase near the floor and sell near the ceiling. For instance, if Bitcoin fluctuates between $30,000 and $40,000, you would aim to buy around $30k and sell around $40k.
This can be repeated multiple times while the pattern holds. Plan your entry using an area rather than a single precise number.
This accommodates normal volatility and spreads. Some experienced participants also take short positions by selling at the top and covering near the bottom.
Avoid chasing the exact bottom or top. Waiting for perfect prices often leads to missed chances.
Stronger setups show repeated reactions at key levels. Look for confirmation signals like increased volume when buyers step in.
This philosophy capitalizes on mean reversion—the tendency for value to return toward the channel’s center. Learning to analyze digital asset charts effectively is crucial for spotting these opportunities.
Identifying Trading Ranges and Chart Patterns
When volatility contracts and candles begin to overlap, a potential trading range is forming. You see highs and lows hitting similar price levels. The asset value oscillates instead of trending strongly.
Momentum visibly stalls during these phases. A flat or gently sloping moving average confirms the horizontal action. This choppy movement signals a consolidation pattern.
Recognizing Sideways and Consolidation Phases
Most of these channels appear after a strong trend. The market pauses to balance inventory. Buyers and sellers test both sides repeatedly.
The result is a box-like pattern. An accumulation phase often forms after price weakness. Buyers absorb supply near the bottom.
Distribution occurs following strength. Sellers push the value down near the top. Recognizing these phases is a core skill.
Using Historical Price Data to Spot Ranges
Pick a timeframe you can monitor realistically. Active participants might watch the 1-hour chart. Others may prefer the 4-hour or daily view.
Look for at least two or three clear reactions at similar highs and lows. Focus on strong price action where candles reject a level and move away. This confirms a boundary.
Mark historical support and resistance zones that have shown repeated touches. Extend these levels forward on your chart. Adjust them as new price reactions occur.
Understanding common chart patterns helps in this analysis. Wider corridors offer larger profit potential but take more time. Tighter setups produce faster, smaller opportunities.
Planning Entries, Exits, and Stop-Loss Techniques
Executing a successful range-bound approach hinges on meticulous planning of your entry and exit points. A clear plan turns market observation into disciplined execution.
Setting Entry Points Near Support
Instead of chasing the exact bottom, place your buy order in an area slightly above the identified floor. For example, if support is $1,400, a bid at $1,410 is wise.
This accounts for normal price swings and order spreads. Your goal is to get filled as the value approaches the support zone.
Placing Stop-Loss Orders Beyond Range Boundaries
Your protective stop must sit just outside the range boundary. For a long position, place it below the support level.
This spot acts as your invalidation point. If the price closes and holds here, your thesis is wrong. Always leave room for volatility and slippage.
If the asset breaks and holds outside the range, exit quickly. This is a core part of sound investment analysis and risk-reward management.
Key steps for your plan include:
- Define entry areas, not single price points.
- Set take-profit orders slightly inside the opposite boundary.
- Place stop-loss orders just outside the relevant range edge.
- Avoid entering new positions in the middle of the channel.
Effective Risk Management and Position Sizing
Controlling potential losses is what separates long-term participants from short-term gamblers. A robust risk management plan keeps your activity sustainable. It prevents volatility and costs from erasing hard-won profits.
Determining Fixed Risk Per Trade
Start by choosing a fixed risk amount for each transaction. Most experienced traders risk only 0.5% to 1% of their total account balance. This is your “account risk.”
Next, measure the stop distance. This is the number of points from your planned entry to your invalidation point beyond the range boundary. Your position sizing formula is simple: account risk ÷ stop distance.
Follow this workflow for every setup:
- Choose your risk percentage.
- Measure the precise stop distance.
- Calculate the position size and round down if needed.
- Check liquidity before entering.
Use limit orders for entries and stop orders for protection. Recalculate your size if entry or stop levels change. Never widen stops to chase a move.
Adjusting Trade Size Based on Range Width
The width of the channel directly impacts your position size. Wider ranges have larger stop distances. For the same dollar risk, you must use a smaller size.
Tighter setups allow for larger positions because the stop is closer. This adjustment is a core part of smart management.
Set a maximum daily loss limit, like -2R or 2% of your account. Stop all activity once you hit it. This discipline helps you avoid revenge trades that compound losses.
Record every plan and review your execution regularly. This habit turns data into improved performance.
Leveraging Technical Indicators for Enhanced Trading
Technical analysis tools provide valuable confirmation when navigating sideways markets. These indicators measure momentum and volatility to help validate your decisions.
They should never replace solid price structure or disciplined risk control. Instead, think of them as a supporting layer for your plan.
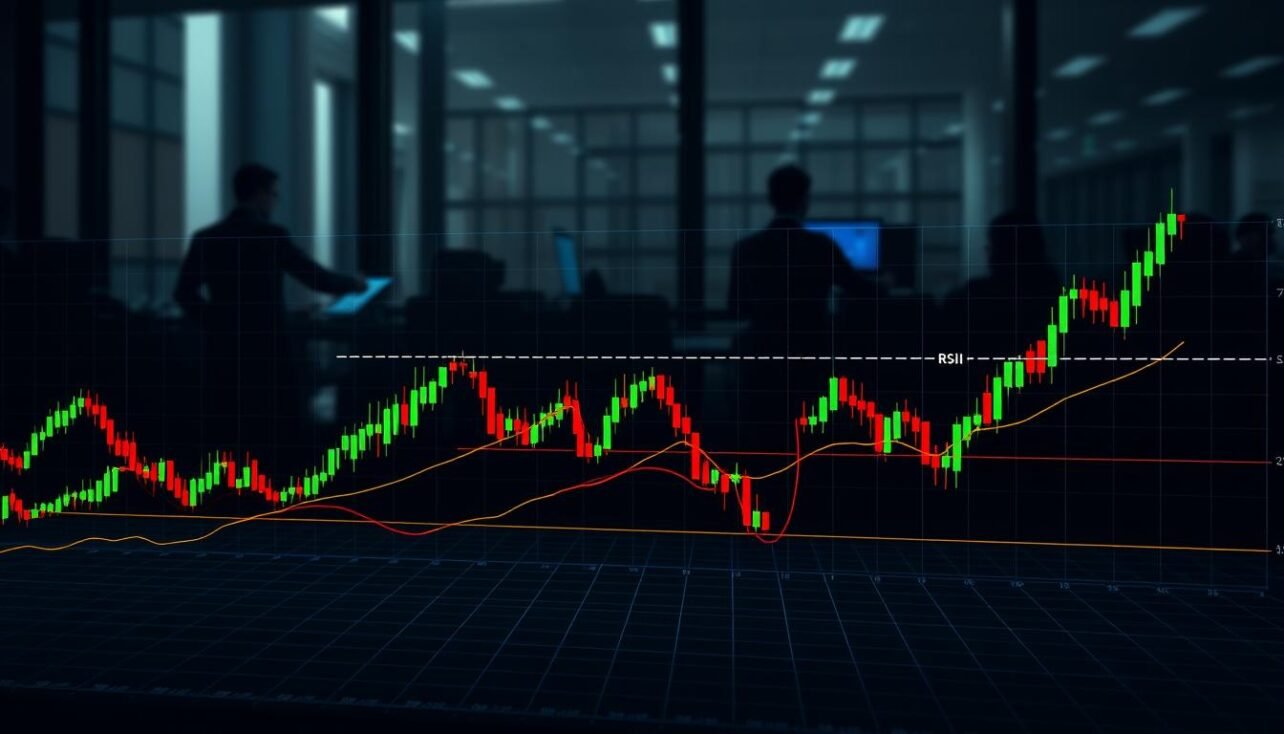
Using RSI, Bollinger Bands, and Moving Averages
Oscillators like the RSI gauge momentum strength. Look for weakening momentum near resistance and strengthening momentum near support.
Overbought or oversold signals alone are not reversal confirmations. They work best with clear price action at key levels.
Bollinger Bands show when price stretches toward range extremes. A touch near a boundary suggests overextension.
Flat moving averages with frequent price crossings confirm sideways market conditions. The Average True Range (ATR) helps place realistic stop-losses.
Volume Analysis for Trading Confirmation
Volume shows if participation supports the price direction. Steady volume suggests a healthy range structure.
The Volume Weighted Average Price (VWAP) identifies fair value during a session. Price above VWAP can indicate buyer strength.
On-Balance Volume (OBV) tracks cumulative volume flow. Rising OBV during a resistance test may support a potential move.
Sudden volume spikes near boundaries can signal strong defense or building pressure. This analysis adds crucial context to any range trading approach.
Automation and Trading Tools: Manual vs. GRID Bots
GRID bots represent a shift from manual effort to systematic execution. These tools place buy and sell orders at preset intervals within a specified price range.
Once you define the boundaries and number of grids, the software works automatically. It buys at lower levels and sells at higher ones as price fluctuates.
Benefits of Automated Range Trading
Automation eliminates the need for constant market monitoring. This is valuable in markets that operate 24/7. The bot handles repetitive cycles without fatigue.
Emotion-free execution follows predefined rules, reducing fear and greed. Consistency is another key advantage. The system never deviates from the plan, maximizing opportunities within the range.
Comparing Manual Execution with Bots
Manual methods offer complete control over each decision. You can incorporate real-time analysis and adjust quickly. However, this approach demands significant time and is prone to emotional mistakes.
Automated strategies save time and enforce discipline. Always set clear range boundaries and risk limits for any bot. Configure shutdown rules if the price breaks out of the channel.
Choosing the Right Platform and Charting Tools
Your choice of tools can make or break your success in sideways markets. The right software provides the analysis and automation needed to act on your plan.
Evaluating Platforms like Bitsgap for Range Trading
Specialized platforms offer comprehensive toolkits. Bitsgap provides manual charting to identify key levels and automated GRID bots for execution.
Its Strategies widget suggests preconfigured approaches based on historical data. This saves traders significant development time.
Integrating Quality Tools for Accurate Analysis
Quality chart tools let you draw lines, apply indicators, and set alerts. This is vital for spotting opportunities.
When evaluating a platform, consider these features:
- Available order types like limits and stops.
- Fee structures that impact net profits.
- Reliable execution during volatile conditions.
- A demo environment to test strategies safely.
Integrating these tools creates a robust system for your method.
Conclusion
A disciplined approach to consolidation can transform apparent stagnation into consistent gains. This trading strategy hinges on buying low and selling high within clear boundaries. It requires identifying support and resistance, then executing with precision.
Mastering these methods teaches patience and reinforces core principles. It can yield steady profits when market conditions move sideways. This makes it a valuable tool for any investor’s toolkit.
Always practice first using a demo account. No range lasts forever, so continuous monitoring and strict stop-losses are essential. When you see a sideways pattern, view it as one of the best opportunities for this approach.
FAQ
How do I know when an asset is in a defined range?
You can spot a market consolidating in a range by observing its price action. Look for periods where the asset’s value repeatedly bounces between two horizontal levels without breaking out. These support resistance zones create a clear channel on your chart. Historical data showing consistent tops and bottoms confirms the pattern, indicating a sideways phase ideal for this approach.
Where should I place my stop-loss in a range-bound market?
Effective risk management requires placing stop-loss orders just outside the identified range boundaries. If you buy near the support level, set your stop-loss slightly below it. This placement protects your capital if the price breaks down instead of bouncing, limiting potential losses. The same logic applies to short positions near resistance.
How do I manage my capital in this approach?
Proper position sizing is crucial. First, decide on a fixed percentage of your capital to risk on any single position. Then, adjust your trade size based on the distance between your entry and stop-loss. A wider range means a smaller position to keep your dollar risk constant. This discipline helps preserve your funds during periods of high volatility.
Which technical indicators work best for confirming range trades?
Oscillators like the RSI (Relative Strength Index) are highly effective. Look for the RSI to bounce near oversold territory when price hits support. Bollinger Bands can also help, as price often moves from one band to the other in a stable market. Combining these with moving averages that are flat can further confirm the lack of a strong trend.
What are the benefits of automating this method?
Automation, like using a GRID bot on a platform such as Bitsgap, can execute trades 24/7 without emotion. It systematically places buy orders near identified support and sell orders near resistance, capturing profits from small price movements. This is especially useful in stable, sideways markets where manual execution might miss fleeting opportunities.
What should I look for in a platform for this activity?
Choose a platform with robust charting tools for drawing precise support resistance levels. It should offer reliable order types for execution, including limit and stop-loss orders. Integrated tools for backtesting your strategies are a major plus. Platforms like Bitsgap are built for these specific conditions, combining analysis with automated functionality.
No comments yet