
Get started with a clear, step-by-step plan to protect your crypto by keeping private keys offline on a dedicated device.
This short introduction explains what you will do: verify authenticity, install firmware, create or recover a wallet, set a strong PIN, and back up recovery words before moving funds.
You will be guided from unboxing to first transactions, with emphasis on critical security choices that reduce malware and phishing risk. The device verifies addresses, amounts, and fees on-screen so you approve every transaction directly.
Expect to confirm a secure HTTPS connection at trezor.io/start and follow the official flow before switching to the desktop app, Trezor Suite. After setup, the app offers privacy features like Tor routing and the option to run your own backend.
Important: Use official cables, avoid unsupported operating systems, and keep a written backup of recovery words. By the end, you will be ready to receive, hold, and send funds with strong security defaults.
Understand Your Goal and Security Model Before You Get Started
Begin with a clear objective: keep private keys isolated and limit attack paths to your funds. Your main aim is to safeguard crypto holdings by using a dedicated, offline device designed to resist remote compromise.
Threat model: the host computer is considered untrusted. The device follows a zero-trust approach and displays raw transactions for you to verify before signing.
Key protections built into the device include a PIN that must be entered to authorize actions. After 16 incorrect attempts, it wipes to stop brute force attacks. There are no wireless interfaces—only USB—so the attack surface is smaller by design.
- Verify on-screen: always confirm address, amount, and fee on the device display.
- Assume the host is untrusted: never approve prompts you do not expect.
- Consider physical risk: passphrases and backups add protection but need careful management.
Default protections are strong, but you can layer more measures as needs change. Treat the device as your source of truth when managing any wallet activity.
What You Need to Set Up Your New Trezor Wallet
Before you begin, make sure your computer and accessories meet basic requirements for a smooth and secure initialization.
Supported platforms: Use a reliable desktop or laptop running Windows, macOS, or Linux. Android can support some flows; iOS is not supported. Keep your system updated to avoid compatibility issues.
Plan to connect over USB only. Use the supplied USB-A to USB-C cable or a high-quality equivalent to avoid intermittent power or data problems. There are no wireless options by design, which reduces the attack surface.
Close unnecessary apps and browser tabs to reduce conflicts. Confirm you can access trezor.io/start in a modern browser that supports WebUSB. If you prefer the desktop app later, you can migrate after initial completion.
Quick checklist
- Computer: Windows, macOS, or Linux (Android supported for some flows).
- Cable: USB-A to USB-C included; test ports for stable connection.
- Environment: quiet, private area for 20–30 minutes to record recovery words.
- Permissions: allow browser or app access; some antivirus or enterprise policies may block connections.
| Item | Why it matters | Action | Notes |
|---|---|---|---|
| Operating System | Compatibility for WebUSB or the desktop app | Use Windows, macOS, or Linux | iOS is not supported; Android works for some flows |
| USB Cable | Power and reliable data transfer | Use supplied USB-A to USB-C or high-quality equivalent | Test ports if device disconnects |
| Browser / App | Initial access method to start the process | Open a modern browser for WebUSB or plan to install the desktop app later | Visit this walkthrough for model-specific notes |
| Environment | Secure handling of recovery words | Allocate 20–30 minutes in private | Avoid cameras and other people nearby |
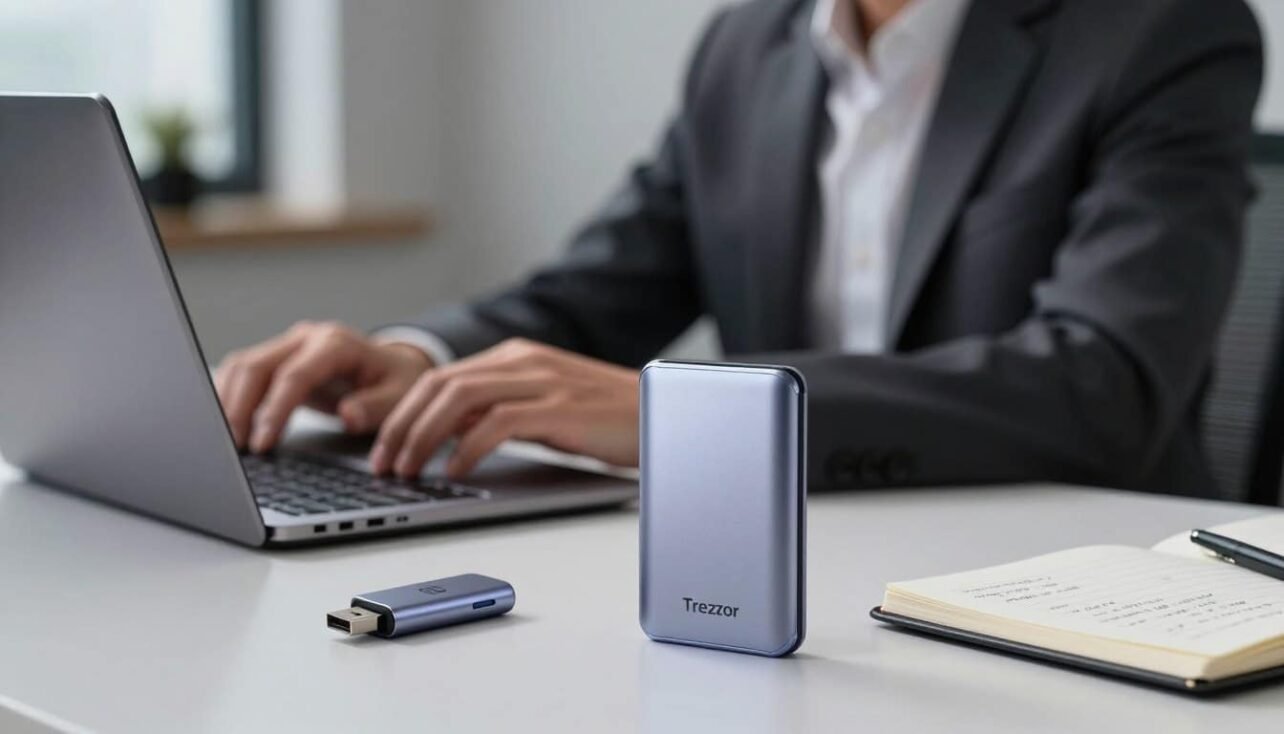
Unboxing and Authenticity Checks for Your Device
Start by confirming the package contents and inspecting any security seals for signs of tampering.
Open the box in a well-lit, private area and compare items to the official list. You should find the device, a magnetic docking pad, a USB-A to USB-C cable, two recovery seed cards, stickers, and a getting-started leaflet.
Do not plug anything in until you complete the checks below. Keep packaging and the leaflet handy for serial numbers and support details during the first minutes of the process.
- Examine the hologram over the USB port; it must look uniform and firmly attached.
- Know the tamper design: the ultrasonically welded seal leaves visible residue if removed.
- If accessories are missing, the hologram looks wrong, or the box is damaged, pause and contact support.
- Store the recovery seed card securely and do not prefill any words.
| Item | Why check it | Action |
|---|---|---|
| Hologram seal | Tamper evidence for the USB port | Inspect for residue or irregular attachment |
| Accessories list | Ensures all official parts are present | Match items to the included list before connecting |
| Recovery seed cards | Safe storage of seed words | Keep offline in a private location; do not photograph |
Security and trust start with the box. Avoid buying from untrusted sellers and record any anomalies for warranty or support follow-up.
Connect to Your Computer Securely and Access Trezor Wallet
Start by opening your browser and typing https://trezor.io/start. Verify the URL and confirm the lock icon shows a secure HTTPS connection before you proceed.

Grant WebUSB Permission
Select your model on the site and follow the on‑screen instructions. The page will ask for WebUSB permission so the browser can talk to your device.
Connect the cable firmly until you feel a click, then grant access when prompted. Use a direct port on your computer and the original cable when possible for the most reliable link.
Install Bridge if the Device Is Not Recognized
If the browser does not detect the device, follow the instructions to install Trezor Bridge from the official downloads page. Advanced users may choose to verify the Bridge PGP signature before running the installer.
Quick Troubleshooting Tips
- Prevent USB ports from sleeping while you initialize the wallet.
- If prompts loop or fail, switch ports, try another supported browser, or reboot the computer to reset drivers.
- Document any error messages exactly to speed up troubleshooting with support.
- After completing the web flow, you can migrate to the Trezor Suite desktop app if you prefer.
| Symptom | Likely Cause | Action |
|---|---|---|
| Device not detected | Missing Bridge or blocked WebUSB | Install Bridge, relaunch browser, allow WebUSB |
| Connection drops | Loose cable or hub issues | Use original cable and direct computer port |
| Permission loop | Browser or driver conflict | Try different browser, reboot computer, check USB power settings |
Install Firmware on Your New Trezor
On first run the unit arrives with only a minimal boardloader and will prompt you to install firmware before key generation completes. Follow the on-screen flow and accept the official update when the site or app offers it.
How the trust chain works: the boardloader verifies the bootloader, and the bootloader checks that the firmware is properly signed. If a signature is invalid, the device shows a clear warning and refuses to continue without explicit action.
- Expect a prompt to install firmware during initial setup; production firmware is not preinstalled.
- Keep connected: do not unplug the device during installation or the process may need to be repeated.
- Avoid unofficial tools: use the default update path so authenticity checks run as intended.
After installation, the wallet enforces on-device verification by default. Match each on-screen prompt with what appears on your computer and make a note of the installed version for your records.
| Step | Why it matters | Action |
|---|---|---|
| Initial prompt | Device lacks production firmware | Accept official install through the provided flow |
| Signature check | Prevents modified firmware | Do not proceed if the device warns about an invalid signature |
| Interruption | Incomplete install can block setup | Keep device connected; retry with fresh USB port if errors occur |
trezor wallet setup guide: Create New Wallet or Recover from a Seed
Decide now whether you will generate a fresh keypair or restore access from an existing seed phrase. This choice determines whether the device creates a new private key and recovery words or imports the words you already hold.

Create new wallet: generating keys and first-time initialization
Choose Create new wallet if this is your first time. The device will produce a unique private key and then display recovery words on-screen for you to copy by hand.
Do not photograph or type the words into any computer or phone. Wait while the device securely derives accounts and confirms each step on its display before proceeding.
Import recovery seed: considerations and secure environment tips
If you restore from seed, select recovery and enter the words exactly as recorded. Perform recovery in a private space with no cameras, observers, or active voice assistants nearby.
- Treat the displayed words as the only backup to the key that controls funds.
- Double-check spelling and the order of words; a single mistake can restore a different key.
- If your environment feels compromised, postpone recovery until you are safe.
- After finishing, verify expected accounts and addresses on the device before moving funds.
| Action | Why it matters | Best practice |
|---|---|---|
| Create new | Generates private key and recovery words | Record words offline, store securely |
| Recover seed | Restores access to prior key | Enter words only on the device in private |
| Verify results | Ensures correct accounts and addresses | Check on-device addresses before transfers |
Set PIN and Enable Core Device Security Features
Before you move funds, configure a secure PIN so the device enforces local access control.
Choose a PIN you can remember but others cannot guess. Enter the code directly on the device, not on your computer. This reduces exposure to keyloggers or clipboard attacks.
Know the wipe protection: after 16 incorrect attempts the device will wipe itself to stop brute-force attacks. That design protects your funds but means careful entry matters.
- Create a memorable yet uncommon numeric pattern. Avoid sequences like 1234 or repeated digits.
- Store the PIN separately from recovery words; never keep them together.
- Use the device settings to review PIN behavior and test unlocking before transferring assets.
- If you suspect exposure, change the PIN immediately and check app access logs where available.
| Action | Why it matters | Practical tip |
|---|---|---|
| Set PIN | Prevents casual access to the device | Enter on-device, not on a host computer |
| Test unlock | Confirms you can reliably use the PIN | Try a few unlocks before moving funds |
| Separate storage | Maintains layered security | Keep PIN and recovery words in different secure locations |
Remember: the PIN protects the device; the recovery words restore the wallet. Both are essential and serve different roles. For additional reading on secure custody practices, see secure crypto wallet in the USA.
Backup Your Recovery Words and Strengthen Recovery Security
Protect your seed now by recording it exactly and storing backups in separate secure places. Write each recovery word by hand on the supplied card, keeping the exact spelling and order shown on the device. Do not take photos or type the words into any online service.
Make duplicates. Create at least one copy and store backups in different secure locations. Label cards discreetly and avoid obvious references to value or contents.

Passphrase and Hidden Wallets
Consider adding a BIP39 passphrase. A passphrase produces a separate hidden wallet and must be backed up separately from the seed. Use passphrases for plausible deniability: keep a low‑balance wallet without a passphrase and store the real funds in the hidden one.
Shamir Backup Essentials
Shamir splits the secret into shards. Plan a shard distribution so losing one location does not break recovery. Safeguard the minimum required shards and record who holds each shard.
- Never store words or passphrases in cloud notes, email, or photos.
- Test recovery on a spare device before transferring substantial funds.
- Revisit backups periodically to confirm they remain accessible and intact.
| Backup Type | Primary Benefit | Practical Action |
|---|---|---|
| Handwritten card | Offline, simple to verify | Write exact words and store in safe |
| Duplicate copy | Protects against loss or damage | Store in a separate secure location |
| BIP39 passphrase | Extra layer and hidden wallet | Record separately and memorize or store securely |
| Shamir shards | Distributed redundancy | Plan shard holders and retain minimum quorum |
Move from Trezor Wallet to Trezor Suite (Desktop App) When Ready
Once initial verification is complete, the desktop app offers a more powerful interface for daily use. The suite centralizes account controls, fee management, and privacy options in a single, offline‑friendly environment.
Why use the desktop app and how to migrate
Download the desktop suite to manage your wallet with a modern interface and richer controls. After the web flow, your accounts and addresses will appear in the app so migration is seamless.
- Features: enhanced account view, fee presets, labeling, and activity history.
- Migration: install the desktop version and open it; your existing session should sync accounts automatically.
- Updates: keep the app at the latest version for stability and security fixes.
Privacy and advanced options
Privacy features include Tor routing to obscure network metadata and the option to run your own backend for maximum self‑reliance. Review settings to enable Tor or point the app at a self‑hosted node.
| Option | Benefit | Action |
|---|---|---|
| Tor routing | Obscures network metadata | Enable in privacy settings |
| Custom backend | Full node independence | Configure endpoint in advanced settings |
| App metadata | Helpful labels and notes | Back up metadata; do not replace recovery words |
Use desktop notifications with care in shared spaces and verify that your devices connect cleanly to the app. Treat the suite as your main dashboard, while the hardware remains the final authority for all approvals.
Verify, Send, and Receive: First Transactions and Asset Management
Before moving significant funds, perform a small test transaction to confirm everything works as expected. This practical example helps you see how addresses, amounts, and fees appear on the device. It reduces risk and builds confidence.

Confirm address, amount, and fees on the device screen
Always verify the receive address on the device display before sharing it. This protects you from clipboard or UI tampering.
When sending, check the full address, the amount, and the network fee shown on the device. Approve only when every detail matches your intent. Never rush through confirmations.
Supported cryptocurrencies and using compatible apps
Review which cryptocurrencies you plan to hold and confirm support directly or via compatible apps. Integration depth varies across partners like Electrum, MetaMask, or MyEtherWallet.
If you use third-party software, consult its documentation for features such as multisig, token management, or staking. In edge cases where a coin needs a specialized app, use only trusted, well-documented software.
- Start with a small test transaction as an example to validate setup before moving larger assets.
- Keep track of multiple accounts and addresses within your wallet to simplify bookkeeping and taxes.
- Label and categorize transactions in your app, but do not store recovery or other sensitive notes there.
- If a transaction fails, check network conditions and fees, then retry with adjusted parameters.
| Action | Why it matters | Practical step |
|---|---|---|
| Verify receive address | Prevents clipboard/UI tampering | Compare on-device address before sharing |
| Confirm send details | Avoids wrong recipients or amounts | Check address, amount, and fee on device screen |
| Use compatible apps | Access extra features for different assets | Consult app docs; test with small transfers |
| Manage records | Simplifies tax and portfolio tracking | Label transactions in the app; keep recovery offline |
Troubleshooting and Best-Practice Settings
When a device misbehaves, clear steps and sensible settings restore function and reduce future risk.
Connection and Bridge checks: If your device is not recognized, reinstall the Bridge software and retry. Swap USB ports, try a different cable, or switch browsers to rule out driver or permission issues.
Bridge installation, browser prompts, and USB checks
Follow the on-screen instructions to grant browser or app access so the device can communicate over USB. Avoid USB hubs that lack power; plug directly into the computer port for a stable link.
Quick actions:
- Reinstall Bridge, relaunch the browser, or try another supported browser when detection fails.
- Replace suspect cables and test different USB ports to eliminate power or hardware faults.
- Document prompts and error messages to speed vendor support if needed.
Advanced options: PIN strategies, microSD encryption, and 2FA-like use
Review settings to balance convenience and protection. Consider a specialized PIN that wipes on coerced entry only if you have verified, separate backups.
Extras to consider:
- Explore microSD PIN encryption where supported; keep the card physically separate from the device.
- Use the device as a 2FA-like security factor for supported services to strengthen access without exposing recovery data.
- In Suite, audit connected devices and disable integrations you do not use.
| Issue | Likely Cause | Recommended Action |
|---|---|---|
| Device not detected | Missing Bridge, WebUSB permission, or driver conflict | Reinstall Bridge, allow browser permission, try another browser |
| Intermittent disconnects | Faulty cable, weak port, or hub power limit | Use original high-quality cable and direct computer port |
| Coercion risk | Forced access attempts | Enable a duress PIN that wipes only with secure backups in place |
| Local data protection | Concern over local file exposure | Use microSD PIN encryption and keep card separate |
Final checks: After fixing issues, run a small test transaction to confirm full access and normal app behavior. Keep a short troubleshooting log to speed future recovery.
Conclusion
Wrap up the process by making a short test transfer and confirming every on‑screen prompt. Take time for each step, and let the device show you approvals directly.
Protect your funds by securing your handwritten recovery words and keeping the PIN separate from backups. Install official firmware and verify package authenticity before you connect the computer or cable.
When ready, migrate to Trezor Suite on the desktop app to manage assets with added privacy and features. If issues appear, follow troubleshooting steps methodically and document versions and instructions for future reference.
With these final checks complete, you can confidently manage crypto knowing your key stays offline and your backup process is reliable. This short guide helps you get started safely.
FAQ
What is the first thing I should understand before I begin?
Know your primary goal: protect funds by keeping private keys offline and minimizing exposure to online threats. Learn how the device verifies transactions on its screen so you can confirm addresses and amounts independently of your computer.
Which computer and cable work best for initial setup?
Use a modern desktop or laptop with an up-to-date browser and a reliable USB cable. Supported operating systems include current versions of Windows, macOS, and many Linux distributions. Keep drivers and browser permissions ready for USB or WebUSB access.
How do I check the device for tampering after unboxing?
Inspect seals and any holograms for damage or residue. Confirm included accessories match the packing list. If anything looks altered, stop and contact the vendor — a compromised device is unsafe for storing keys.
How do I securely connect the device to my computer?
Go to the official start page and verify the site uses HTTPS. Grant WebUSB access when prompted, and avoid third-party links. If the browser doesn’t detect the device, install the official bridge software following on-screen instructions.
When and why do I need to install firmware?
Install firmware during first-time setup or when an update is recommended. The device uses a bootloader to verify firmware authenticity; follow the on-device prompts to ensure the firmware is genuine before proceeding.
Should I create a new account or recover from an existing seed?
If you’re starting fresh, choose the create-new option to generate a new key pair on-device. Recover only if you have a verified recovery phrase from a prior device. Always perform recovery in a private, secure environment.
How should I set a PIN, and what protections does it offer?
Choose a strong, memorable PIN that’s not guessable from your life. The device enforces retry limits and wipe protections after repeated failed attempts. Never store the PIN with your recovery phrase.
What’s the correct way to back up my recovery words?
Write the seed words exactly as shown on the device, in order, using the supplied card or a metal backup for durability. Store backups separately from the device and PIN, in secure, geographically distributed locations if possible.
What is a BIP39 passphrase and should I use one?
A passphrase adds an extra secret layer to your recovery words, creating hidden wallets for plausible deniability. Use it only if you understand the risks: losing the passphrase means losing access permanently.
How does Shamir backup differ from a standard seed?
Shamir splits the master secret into multiple shards, requiring a subset to recover funds. It increases resilience but requires disciplined shard storage and trusted custodians for each piece.
Why move to the desktop app and what are the benefits?
The desktop application provides more features, local state, and enhanced privacy options like Tor routing and self-hosted backends. Migrating is straightforward and preserves your existing device keys.
How do I verify an address before sending funds?
Always confirm the receiving address, amount, and fee on the device’s own screen. Do not rely solely on your computer’s display — the device shows what will be signed and broadcast.
Which cryptocurrencies can I manage on the device?
The device supports many major coins and tokens. Some assets require companion apps or third-party integrations. Check the official compatibility list and use supported apps for each asset.
What common connection problems occur and how do I fix them?
Typical issues include faulty USB cables, blocked browser permissions, or missing bridge software. Try a different cable or port, allow WebUSB access, update your browser, and reinstall bridge if needed.
Are there advanced features to harden security further?
Yes. Consider specialized PIN schemes, using a microSD-based PIN for extra encryption, and combining the device with additional 2FA-like practices. Review settings carefully and test recovery before storing large amounts.
How long does full initialization and backup usually take?
Expect initial setup and secure backup to take 10–30 minutes depending on reading and writing the seed carefully. Firmware installation or software downloads may add time, so plan accordingly.
Where can I find more detailed troubleshooting and official resources?
Use the official support site and documentation for step-by-step articles, compatibility lists, and verified downloads. Rely only on official channels to avoid phishing and fake software.
No comments yet